Getting Started Guide
Navigation Drawer
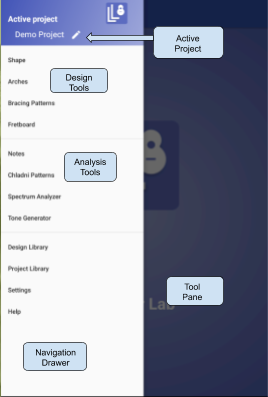
The Navigation Drawer is used to select the active project, and to access the tools. The selected tool will be loaded into the Tool Pane.
The tools are grouped into categories: Design Tools, Analysis Tools, and miscellaneous.
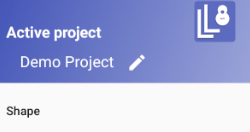
At the top of the Navigation Drawer, the Active Project is displayed. The active project can be changed by pressing the edit icon (![]() ). In this example, the active
project is Demo Project.
). In this example, the active
project is Demo Project.
You can dismiss the drawer by swiping to the left or pressing an area outside of the drawer. Press the Navigation Drawer icon (![]() ) at the top of the screen to show it again.
) at the top of the screen to show it again.
Design vs Project
It is important to understand Designs and Projects, and how they differ from each other.
Design
A Design describes a model of an instrument, such as Dreadnought, OM, or L-00. A Design includes:
- Shape of an instrument
- Arches (if any)
- Bracing patterns
- Fretboard
One Design can be used in multiple Projects.
Project
A Project is a specific instrument that you are making. If you are building two identical guitars, one for Sally and one for Alan, there will be a separate Project for each. A Project includes:
- A design
- Chladni pattern photos
- Spectrum analyzer samples
- Notes
Demo Project and Demo Design
Luthier Lab includes a starter project called Demo Project,
which uses a design called Demo Design. Demo Project (and
Demo Design) can be used to experiment with the Luthier Lab tools. You
can think of it as a “sandbox” or “scratch” area.
When you are ready to create your own project, see Adding a Project.
Active Project
The active project is the currently selected project. Any changes you make will be stored in that project. The first time you run Luthier Lab, the active project will be the project named Demo Project.
The active project is shown at the top of the Navigation Drawer.
Changing the Active Project
You can change the active project by pressing the edit icon
(![]() )
next to the project name (at the top of the
Navigation Drawer).
)
next to the project name (at the top of the
Navigation Drawer).
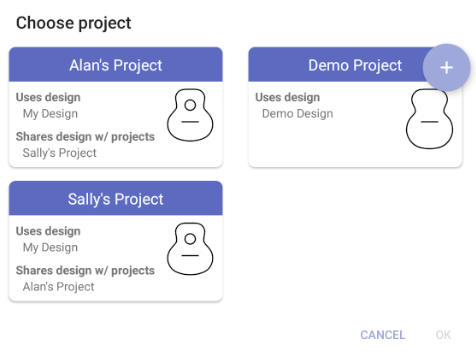
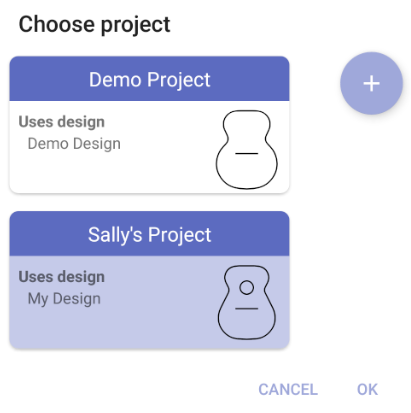
The Choose project dialog will be displayed, with a list of
your projects. You can select one of those projects, or press the
plus sign icon
( )
to create a new project.
)
to create a new project.
In this example there are three projects. You can see that Alan's Project and Sally's Project share a design (My Design). The Demo Project uses design Demo Design, which is not shared with any other projects.
Adding a Project
When you are ready to create your own Project (corresponding to an instrument you are making):
- Press the edit icon
(
 )
next to the project name (at the top of the
Navigation Drawer). The Choose project dialog will be displayed:
)
next to the project name (at the top of the
Navigation Drawer). The Choose project dialog will be displayed:

- Press the plus sign icon
().
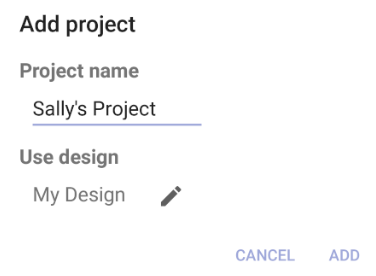
The Add project dialog will be displayed:
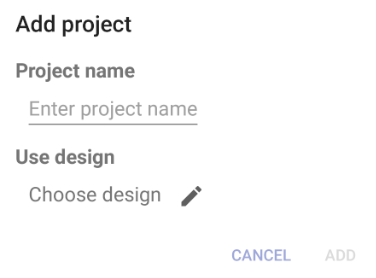
- Enter a name for your project, for example: Sally's Project.
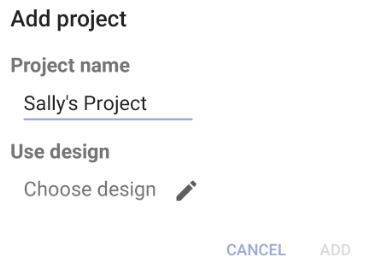
- Press the edit icon
().
The Choose design dialog will be displayed, showing all of the stock
designs and any custom designs you have previously created.
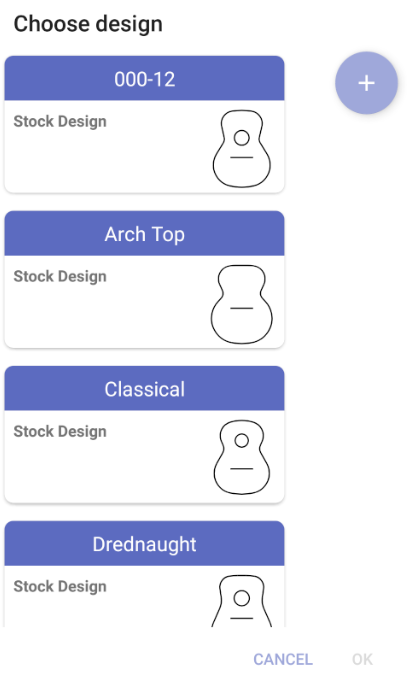
- Scroll through the designs and select the one you want. For example:
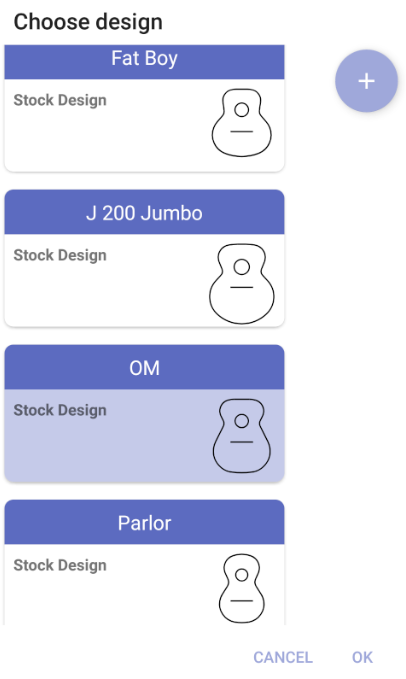
- Press to select this design. Luthier Lab will create
a new design based on the selected design (in this case: the OM design).
By default the new design's name will be based on the project name (in this
case: Sally's Project's Design). You can use the default name, or choose your
own name, for example: My Design.
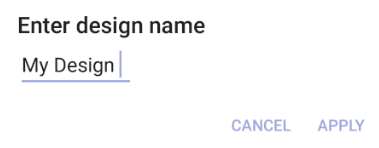
- Press to choose the design name. The
Add project dialog will be displayed again, showing the project name and design you have selected.
- Press to create the new project, and add it to your Project
Library. The Choose project dialog will be displayed again, with your
newly-added project selected.
- Press to select your new project. At the top of the Navigation
Drawer you will now see your new project as the Active project. The tools will
now operate in the context of the new project (your data will be saved in the
new project).